Beauty
A Guide To Overlining Your Lips, Straight From A Celeb Makeup Artist
A makeup artist breaks it down step-by-step.
From the gym lips trend, to the no makeup makeup looks so associated with this year’s reigning clean girl aesthetic, one sentiment always seems to remain: Enhancing one’s natural pout to be as plump and juicy as possible will always be a vibe.
And believe it or not, overlining one’s lips has been around since as early as the 1920s, with legends like Marilyn Monroe, Audrey Hepburn, and the ’90s icon Pamela Anderson tapping into their personal versions of the look during their heydays. Most notably for Millennials and Gen Z girlies alike, however, the trend was once more brought to the forefront in a major way back in 2015 by the lip kit queen herself, Kylie Jenner, and has since evolved to the coquettish overlined looks, expertly painted with contour and sculpting techniques so often seen today on A-listers and it girls alike. What’s more, the once ever-popular matte finish has now transformed to looks that have long-wear shine.
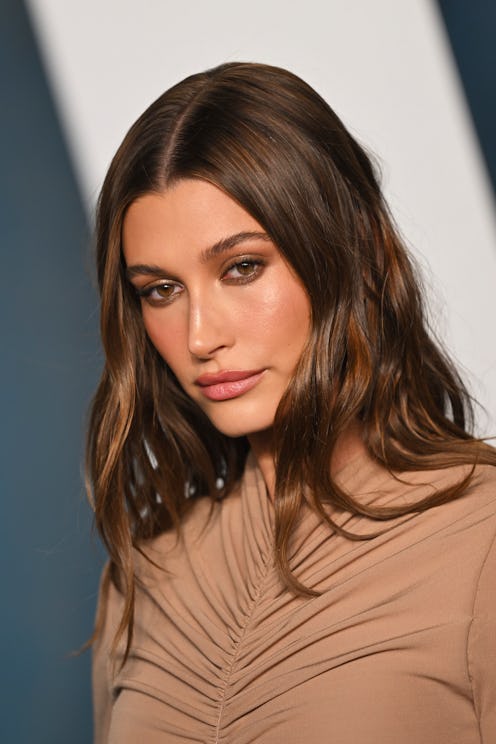
To break down the process of overlining your lips in four easy steps, Bustle tapped Diane Buzzetta, a celebrity makeup artist who has glammed the likes of Hailey Bieber, Kendall Jenner, Paris Hilton, Hailee Steinfeld, and more iconic faces.
We at Bustle only include products that have been independently selected by our editors. We may receive a portion of sales if you purchase a product through a link in this article.
Finding The Best Lip Liner For Overlining
First things first — Buzzetta shares an easy way to find your perfect overlining hue: “For a more natural overline, find a neutral or pink lip pencil shade that is closest to your natural lip color with similar undertones.”
As for an overlined lip that’s a more statement-making color, like a bold red shade (that’s on-trend this fall), a hue that’s slightly darker, but with similar undertones, to the lip color you’re wearing is an easy way to create dimension.
The Guide To Foolproof Overlining Your Lips
Step 1: Take Time To Prep
“Always start with a clean, hydrated lip. I recommend using a lip scrub prior to makeup application, or using an exfoliating make up wipe to take off any excess product that may have gotten on your lips. Make sure there is no peach fuzz or any unwanted hair above the lip prior to overlining to help the makeup lay more smoothly, and set the skin around the lip area with powder before overlining to help it last.”
Step 2: Start Sculpting
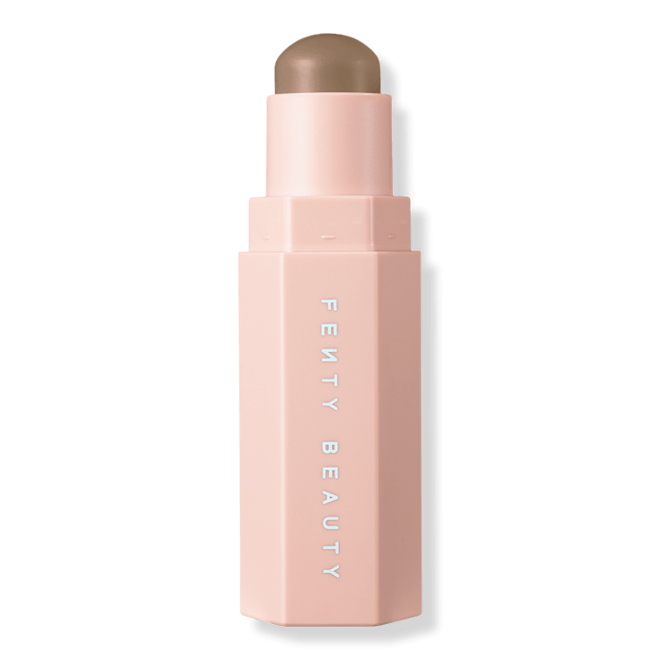
To create lips that look naturally full, steer clear of harsh lines, opting for a softer diffused shadow around the lips. Buzzetta notes how she “likes to use a contour cream around the lips to help sculpt lips prior to overlining.”
IMO, Fenty Beauty’s Match Stix formula is the perfect formula to get the job done — and it comes in a wide range of colors for every complexion.
Step 3: Line & Diffuse
“Every lip shape is different, so some lips may only need a little overline on top and not on the bottom, [for example]. I start on the top lip at the cupid’s bow to create my shape, lining just outside the natural border of the lip. Then, I draw towards the corner of the mouth. For the bottom lip, I like to start at the corner then connect towards the center.”
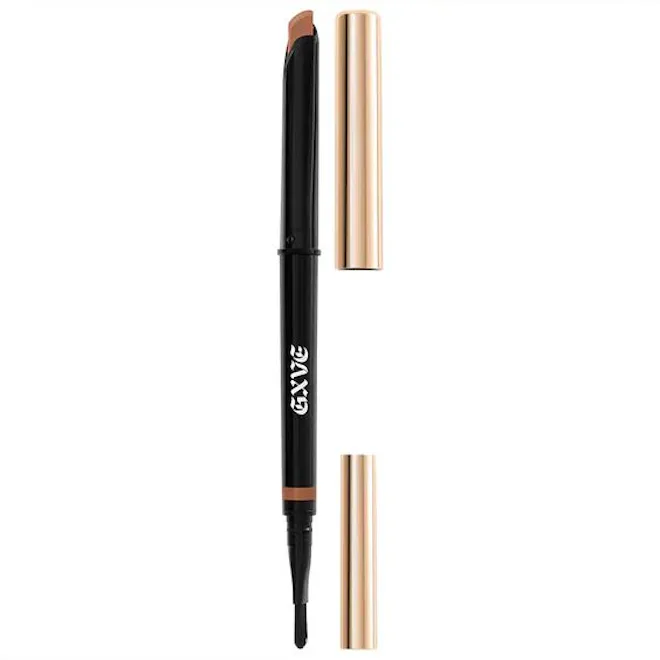
“Then, I take a lip brush to soften the lip liner for a more natural looking fullness. GXVE’s Pout to Get Real Lip Liner has a dual-ended brush that is great for blending and diffusing.”
Step 4: Layer To Perfection
“Once your lips are lined, you can apply a lipstick of your preference, then a gloss in the center of the lip to complete the perfect plump pout.”
Et voilà — natural looking overlined lips, made super easy.
The TikTok-Viral “Oval-Lining” Technique
TikTokers continue to share epic beauty techniques and life hacks — and the latest to take over the platform is called “oval-lining.” Just as the creator Katia Haek notes, it is done exactly as it sounds. Instead of overlining the edges of your lips, the focus is creating fullness in the center, starting with an oval shape that covers the middle of both top and bottom lips. The result? Flirtatiously pouty lips that gives all of the Bratz vibes.
Depending on your lips and your own personal preferences, practice makes perfect with any overlining technique — and the beauty of makeup is just how experimental and unique it truly can be.
